| Miniatures Painting Guide and FAQ |
Archive-name: games/miniatures/painting-faq Rec-games-miniatures-archive-name: painting-faq Last-modified: 10/22/1996 Author: tierna@agora.rdrop.com - with tips gathered from posts on rec.games.miniatures and from readers of that group Comment: Available for FTP from rtfm.mit.edu in usenet/rec/games/miniatures or from kewlaid.highfiber.com /pub/rpg/miniatures or by email from tierna@highfiber.com or tierna@agora.rdrop.com. Frequently Asked Items This document is presented to help the inexperienced miniatures painter get a grasp of the basics. Most answers given were collected from months of discussion on rec.games.miniatures and represent the experiences and tips of a great many people. The rest of the answers are Britt's, compiled from hours and hours of experimentation and practice. Many answers are not absolute. Painting is an art and in art there are few absolutes. This FAQ is scheduled to be posted monthly, around the 20th of each month. An informal format is being used because it's easier. NOTICE: This document is Copyright (c) 1995 by Brenda Klein. Use and copying of this information is permitted, so long as the following conditions are met: o no fees or compensation are charged for use, copies or access to this information beyond the Internet o this copyright notice is included intact IMPORTANT CHANGE: The email addresses of the FAQ maintainer are now: tierna@indirect.com and tierna@agora.rdrop.com NEW STUFF: Section 6: "How do I strip paint" has been updated with new information on plastic figures, and two new paint strippers. Section 9.A.b: "How do I paint hair" has new and better techniques for both blond and red hair. Contents ================ (* denotes changed entries) 1. How do I get started painting? * 1.A. Are there books on painting available? 1.B. What kind of paints should I use? 1.C. What kind of brushes should I use? 1.C.a. How should I clean my brushes? 1.D. What other equipment do I need? 2. Should I prime? (Also, what should I do to the miniature before priming?) 2.A. Black, white, or gray? 3. What's the first step after priming? 4. What are shading, washing, drybrushing, highlighting and glazing? 4.A. How do I wash? 4.A.a. Why do my washes dry badly? 4.B. How do I drybrush? 4.C. How do I highlight? 4.D. What are inks, should I use them, and if so how? 4.E. What colours should I use for detail work? 5. What should I use for bases? 5.A. What's the best stuff to cover bases with? 6. How do I strip paint? 7. What kind of miniatures should I start with? 7.A. Metal or plastic? 7.A.a. My miniature came in multiple parts, now what? 7.A.b What is pinning and how is it done? 8. What is kitbashing? 8.A. How do I convert miniatures? 8.B. What kind of glue should I use? 9. How can I paint details? 9.A. How do I paint faces? 9.A.a. How do I paint eyes? 9.A.b. How do I paint hair? 9.B. How do I paint insignia? 9.C. How do I paint armour? 9.D. What other detailing can I do? 9.D.a. Can I use anything besides paint and ink for details? 10. What is an overcoat and should I use one? 11. How do I keep paint from drying out? 12. How do I use an airbrush for miniatures? 13. How/where do I get miniatures? 13.A. Is there a list of companies? Questions and Answers ============================= 1. How do I get started painting? Get some paint, brushes, miniatures, and a space to do your work. There is no `secret formula' involved, and despite all the advice and information you'll get from this FAQ and other sources, the best method of painting is the one that works for you. If you prefer one type of paint to another, that's great. Painting is a hobby, not an exact science. Pick and choose, practice, relax, and enjoy yourself. Take advice only if you feel right about it. Be patient with yourself. Most painters have a box of the stuff they learned on, or have removed old paint and redone several of their miniatures. Good painting's a skill. Remember: PRACTICE. Try different materials and techniques. Don't take anyone else's word for it unless you're sure - and the practice will do you good. * 1.A. Are there books on painting available? There are several, though probably not all publications will meet all painters' needs. The best descriptions and information available at this time are listed below: Citadel produces a Painting Guide which is a $1 pamphlet. It was also reprinted in the back of _Golden_Demon_Awards_, which covers the finalists and many entries in the 198? Golden Demon Awards , and also in _Fantasy_Miniatures_, which is likely a later printing of Awards. Citadel currently produces a book for its games called _'Eavy_Metal_. The book retails around $20 US and has a lot of excellent information, if you remember that the only standards you need to adhere to are your own. Some people love the way GW- painted miniatures look, others hate them. It's all a matter of taste. The first edition of _BattleSystem_ (TSR, trademark, blah-blah) had a nice, though thin, intro to painting with pictures of a work in progress. (Thanks, Coyt!) (David Lee McLellan is to be thanked for finding the next two titles.) _The_Armory_Painting_Guide_to_Military_Miniatures._ A 24-page pamphlet which costs $3.00 US. They also do a painting guide to horses which costs $2.00 US. Both are aimed at the wargaming audience. _Building_and_Painting_Scale_Figures_ by Sheperd Paine, available from Kalmbach Publishing. (Steve Gill kindly listed the following from his personal library.) _Making_Model_Soldiers_of_the_World_ by Jack Cassin-Scott pub: John Bartholomew and son Ltd 1973, 1977 Quite a good little book, covers design, sculpting and casting of figures as well as sections on painting. Due to it's emphasis on 54mm Napoleonic figures it has a very good section on horses. _The_Encyclopedia_of_Military_Modelling_ gen ed Vic Smeed, con ed Alec Gee pub: Octopus Books 1981, Peerage Books 1985 Large coffee table size book: has sections on all the major historical periods, the different types of figures available, equipment, vehicles, dioramas and displays. Sort of a collection of long articles from the Military Modelling magazine crowd. _Buildings_for_the_Military_Modeller_-_Design_&_Construction_ by Ian Weekley pub: B.T.Batsford Ltd 1989 Covers Ian Weekleys building techniques, more is spent on describing the subject than the techniques used, unfortunately, but very inspirational. (Gary Leitzell himself kindly provided the information about his book.) _Brush_Strokes_. Has been advertised in Military History Magazine, had reviews in MWAN and The Courier and had an article published in issue 61 of Courier on painting. Mail orders to World Games Network, P.O. Box 15834, Pittsburgh, PA 15244. Include $12.95 per copy, which includes shipping and handling, in check or money order. There's also a magazine which might be of some interest to painters. Forge has some general interest painting and modelling information in each issue and is otherwise dedicated to Warzone. It is $2.95 per copy and has a subscription rate. It's produced by Heartbreaker Hobbies. Also, Renaissance Ink publishes a monthly newsletter that covers painting techniques (12 issues $15.00). We also offer a pocket miniatures painting guide with shadeing and highlighting chart for paints and inks ($0.50). To receive these publications mail: Renaissance Ink 335 Torrance Ave Vestal, NY 13850 More information can also be obtained from Jay Worth, publisher of the newsletter, at jwirth4702@aol.com. 1.B. What kind of paint should I use? This question has sparked some vigorous discussion from two major camps: acrylics and enamels. First, a description of what these terms mean: Oil- or solvent-based. These tend to be a bit thicker than acrylics and require that you have thinner on hand for washing, thinning, and brush cleaning. These paints are often referred to as enamels, but some acrylics can be enamels as well, so when in doubt, read the label. Acrylic paint is water-base and tends to be smoother, though if it gets dry it can become grainy. All you need to thin or clean up with this stuff is tap water. Discussion on the newsgroup rec.games.miniatures has uncovered that more posters prefer the acrylics to oils. (This author uses acrylics.) Again, a matter of taste. The basic colours from which just about anything can be mixed are white, black, brown (you can mix this yourself, but it's a pain), red, yellow, blue, and gray (same as above). Metallics, various shades and hues, practically anything you can think of is available through one company or another. Start with the basics and expand as you feel you need it. Soon enough you'll have more paint than you ever imagined you'd need, and likely use every one. Most like-type (acrylic or oil) can be mixed regardless of brand, but be cautious at first as some brands are incompatible. Companies which manufacture miniature-formulated paints: Ral Partha (acrylics and dragonscale metallic creams) Floquil/Polly S (acrylics and oil-base) Armory (acrylic) Pactra (acrylic enamels) Model Master (oil-base and acryylic) Humbrol (oil-base) Dragon Colour (acrylic) Citadel (acrylics and specially-formulated inks) Howard Hues (acrylic) Tamiya (fine acrylics, almost transparent) Gunze Sangyo's Aqueous Hobby Colour (fine acrylics) Horizon (acrylics for vinyl models - good on primed surfaces) Accuflex (acrylics - formulated for airbrushing, also makes a good primer) There are other companies, of course, these are just the ones the author could think of right now. Most paints are available at your local hobby or gaming shop, and places that specialize in miniature railroad equipment often have the best selection. Railroad paints are often oil-based, but primers and sealers of that type are usually quite good at preserving detail. Paints may be bought by the individual bottle (usually under $2 US per) or in sets. If you buy a set, be sure that you can _see_ all the paints before purchase. This way, you'll assure that you get what you're looking for and that the consistencies are good. SHAKE all paint before purchase, to make sure they mix up well. 1.C. What kind of brushes should I use? Brushes come in a myriad of sizes and several different materials. Sizes range from 1" to 20/0 or more. The more 0s the smaller the brush, generally, however companies vary in size so the only true scale is to look and compare. Materials are sable, fox, camel hair (which is actually squirrel tail, BTW), ox hair, and nylon. Round and flat are also available. Red sable is the painters' choice, usually. A large brush for primering and large areas, something between a 000 and 5/0 for smaller areas, and anything from a 10/0 to a 20/0 for fine detail. Drybrushing destroys good brushes so a couple camel hair for drybrushing is a good idea. Again, look at them before you buy. Make sure the tips are smooth and end in a point and the sizes are right. A good brush retails anywhere from $3 to $8, so it's a purchase to take time over. Brushes are available at hobby and game shops, often at crafts stores at a better price. 1.C.a. How should I clean my brushes? It depends on your paint type, mostly. For acrylics which are water-based, a good careful washing with warm water and dish detergent is fine. Remember to re-form the tips into points before storage. For oil-based paints, your best bet by far is to buy a bottle of thinner made by the same company as your paints. Not all paint is formulated the same and thinner is often product-specific. Also, Badger brand "Air-Opaque ready-to-use- cleaner" for airbrushes does a wonderful job of getting dried paint off of paintbrush bristles, either acrylic or oil-based. It costs $4 for 16oz. (Thanks to Bill Gilliland for that tip.) While we're at it, there are three `nevers' to brush-handling. Never let your brush rest in the water or thinner on its tip. That's the surest way possible to lose a fine point. Never scrub a good brush across either miniature or blotter. Never let paint dry on your brush. This'll fray the bristles into an unusable mass. When cleaning a brush while painting, gently rotate it against the side of the solvent/water container until the bristles stop exuding paint. A gentle wipe across the blotter before washing the paint out of the bristles both saves solvent/water from clouding prematurely and helps get rid of traces of paint you can't readily see. A clear solvent/water container is desirable so you can monitor its cloudiness and how clean the brush is coming. 1.D. What other equipment do I need? Not much. Something to hold your water/solvent (two of them if you're working with metallics, one for the regular paint and one for the metallic - keeps flecks out of the other stuff, and change often to keep from muddying your colours), a palette of some sort (professional, ceramic tile, old plate, even the plastic bubble from a large miniature or two - Coyt suggests the plastic lid from a large margarine tub or the like covered with foil. When done, strip the foil off and discard), and GOOD LIGHTING. Against a window is ideal, if not a good overhead light or adjustable lamp is a must. Paper towels or napkins - some for blotting your brushes on and some extras for the inevitable spill or splatter. Time - never enough of that so learn to paint bits at a time (also good so that one layer can dry before you put on another). Ventilation, ventilation, VENTILATION! All paints give off noxious fumes, whether you can smell them or not, and unless you like having headaches, you'll want lots of space, open windows, even a fan or two. The above are the _needed_ things. Below are optional: A magnifying glass - useful for seeing fine detail. [A tip from Coyt D Watters which might be useful: "I started using a magifying visor (jewelers) which gives me 2x and flips up out of the way. Gee what a difference! Now I can easily detail those little things like dart feathers, buttons, and laces. My 0 brush looks about 5" around though. They are a little expensive, but a good quality one can be purchased from Micro-Mark for under $20. And, because it's on my head, I don't have to move around to get a good clear view, nor is a magnifying glass in the way of my brushes."] An X-acto blade can be helpful, tweezers can be invaluable if you'll be gluing, files and emery boards are used to remove sprue, mold lines, and anything else you don't want. Nail scissors get into places larger ones can't. As you get more practiced you'll start finding other things to use in your painting pursuits (such as toothpicks and small brushes), so you'll acquire your own personal array in time. 2. Should I prime? (Also, what should I do to the miniature before priming?) Yes. Primer not only assures for good paint adhesion, but it also brings up detail more starkly than on an unprimered miniature. Now that that's settled, we go into another major area of controversy among painters: how? The only thing painters seem to agree upon is that a spray primer is best, and the primers specifically formulated for miniatures are better at retaining detail. Some folks use Krylon with very good results, but it takes a light and even spray to retain detail. Companies that put out good spray primers are Ral Partha, Armory, Floquil, Model Master, Testors, and Citadel. Krylon is the best of the non-hobbyist primers, but other store brands are in the same league. If you use sandable primer, be especially careful to use thin coats so as to not obscure detail. (Many department stores and most home improvement centers carry spray primer at much lower cost than hoby and other specialty shops.) BEFORE APPLYING PRIMER you will need to clean up any bad lines on the miniature (use a small file, X-acto knife, or emery board), making sure you get rid of the bump under the base, if your miniature has a self-molded base (sandpaper is excellent for this), then WASH it in a little soap and water. Various substances are used on miniatures to make them come free of the mold, as well as the fact that hand oils get on the miniature as it's handled, and these will interfere with paint adhesion unless cleaned off. Now, use a little white glue (or rubber cement - thanks Ed Sharpe!) and glue the miniature to a base of cardboard, cork, wood strip, popsicle stick, ruler, plastic bottle cap... Anything you can safely handle without touching the figure. This assures that you can handle the miniature during the painting process without touching wet paint. Even a freshly dry coat will rub off without the slightest provocation. Methods of applying primer are spraying and brushing on. If you're using a brush-on primer, make certain it flows well without being too thin and use a semi-large brush to brush over your miniature from top to bottom. If you're spraying, set up a large box enclosed on three sides in which to place your miniatures for priming. This will keep the paint from going everywhere and also tends to give a better coat. Make _sure_ you have good ventilation, outdoors or in a window or set up a fan. Spray paint is nasty. On the subject of technique, the best advice I've seen came from Deep Six (sl9b4@cc.usu.edu), as posted to rec.games.miniatures, and is edited and used here without permission: "First, be sure you shake the paint well. It says on the can you should shake it for a full minute, so I do it for two minutes. Shake during use, too. The second thing is spraying the figures with the `good' stream of spray. You do this by starting the spray before it hits the figs and stopping the spray after it hits the figs. The spray that comes out of the can when you first start spraying and when you stop spraying is incomplete -- it has too much or too little paint, and/or too much or too little carrier. What I do is put the figs out on newspaper and start spraying the newspaper to one side of the figs, when the spray has been coming out for a half-second or so, I pass the spray over the figs, and when the spray has passed over the figs, I stop. This assures that only properly mixed paint is falling on the figs. It takes longer and wastes some paint, but the finish is worth it to me. Next, keep the can as upright as possible, and keep the nozzle about 10 inches from the figs. Any closer and it's too hard to control the amount of paint on the figs. Any further and the paint starts to dry before it hits the figs. And finally, IMO you should never use a whole can of paint (on figs anyway). It seems like when the can is about 3/4 of the way empty, the paint is really crappy, uneven and it comes out of the can in spurts." And Coyt reminds us to always make sure you get the underside of the miniature as well, particularly if it's a figure in a cloak or the like. Spray upward and at an angle and make passes from all sides to assure coverage. 2.A. Black, white, or gray? A thousand answers exist for this one. The best advice available seems to be use what you prefer. White primer makes colours go on brighter and is best for anything on which you want that effect. Black primer gives good shadows and is commonly used to base modern military and skeleton figures. Gray is rather neutral allowing for brighter light colours and decent shading. The best tip so far is to experiement and see what you like. Also, and the author likes this effect, prime in black and then drybrush raised areas in white before painting. This allows for the depth of the darker shade but gives the lighter base for the brighter colors. 3. What's the first step after priming? Pick the colours you want for the major areas (skin, each piece of clothing and armour, hair, shield) and paint them on in layers. Think of dressing the miniature. Start with eyes, move on to face and hands, then clothing, armour, hair, lastly weapons. You aren't going for massive detail just now, you're only setting each area's base colour. Make certain the paint goes on smoothly and remember to paint from top to bottom. Once you have this part done, it's time for detailing. This is achieved by many different techniques such as drybrushing, washing, shading, and highlighting. 4. What are shading, washing, drybrushing, highlighting and glazing? These are techniques to give a little realism to your miniatures. % Shading and highlighting give the illusion that there is light shining upon the figure. Shading details the folds and shadows and highlighting picks out the brighter, better lit areas. Washing, glazing, outlining and blending are all methods of shading. (See below.) % Drybrushing is a highlighting method, as is simply accentuating the high spots with a bit of paint a bit lighter than the base. (See section 4.B.) % Glazing is done with inks, as can be washing and outlining. (See section 4.D.) % Outlining is simply picking out the line between two seperate parts of the miniature (i.e. sleeve and arm) and painting or inking in a fine line of either black or a darkened shade of the base in order to bring out the division between the two sections. % Blending is rather difficult and takes much practice. To blend one changes the tone of the paint as it crosses the surface of any non-detailed section, as Mecha armour or unscaled hide. Darker shades are laid into any depressions and carefully thinned and blended into the surrounding areas using a damp brush. (This is NOT a technique for beginners. The author still has trouble getting her blending to look good, and finds nothing wrong with not shading miniatures at all. Again, try it and see if you want to practice the technique or not. Another personal-choice situation.) Some excellent advice from Coyt D Watters: "If you're using acrylics, you can pick up several TONING MEDIUMs, which alter the brightness of the paint without the headache of black. I've started using a drop of white, a drop of black, and a drop of toning and mixing all four with equal parts of the color I'm using, so I get light - color - toned color - dark My first attempt was on one of the mages in Partha's Forgotten Realms set, and the cloak looks better than anything I've done, and I haven't drybrushed or washed it yet."] And a tip from Christian Widmer (widmer@avalon.unizh.ch): "Use a slower on acrylic colours. This slows them from drying but they do still not cover if they didn't before. Warning, oil colours tend to lose their colours and go brown-grey when I try this." Nick Fogelson (fogelson@ursula.uoregon.edu) shares his methods, which are far better than anything the author could provide (used without permission): "The way I always do blending is to put a smudge of the two end colors in a strip, separated about 1.5 inches. I then use a slightly moist brush to mix them together into a spectrum. The colors near the original smudge will be closer to that color, the colors in the middle should be fairly even mixes of the two. You then have a nearly infinite palette of color to use. You can do a nice blend with only 5 or so shades that looks really good unless you magnify it. Alternatively: Say you want to go up red to yellow. Paint the entire area yellow. Put a block of watery red on the top. Slowly draw a moist brush down the area, drawing the red pigment with it. If you're patient, this method will bring the best results (but if you're not, you'll get a big mess)." Kenneth Creta~ (kcreta@sedona.intel.com) also has two good techniques: "This idea was suggested by Tom Harris and I added a little of my own touches. Let's say you want to fade from green to black. Just paint the whole darn thing green. At the point where you want it to fade, wash with a black ink. When dry, wash again but a little farther down and so on until the bottom is black. The first ink is not a smooth transition so when the washes are done, go back and dry-brush green over the first ink line and this will smooth it out. The washes may be diluted to the desired consistency." "Start by painting a band at the bottom in dark green. While it's still wet, add some white and paint the slightly lighter green band above it. Use a second brush and paint along the line between. If the paint is still wet, they should blend together pretty good. I use a slightly damp brush. If you get enough bands, it's looks like a gradual color change. The hardest part is the blending between the bands." Here's another banding method from Roxanne Reid-Bennett (reid@sfcpmo.enet.dec.com): "I have a Water Elemental that was done in this style (Rafm). The typical way of handling this is to "blend" two colors together (which I have a LOT of trouble with). What I did was to paint the base (bottom 1/2") dark blue (RP Paladin) then used graduated shades of blue (about 5 different) up towards the top of the figure where I used a light blue (Sky) for the upper torso of the elemental. After the bands were in place I went back and used mixed intermediates on the band overlap areas. I kept this up until the graduated shading looked right. Some of the intermediates I watered down some so they wouldn't go on very thick. I really wish I could "blend" like the books and FAQ say - by mixing the two wet paints in the middle - but so far haven't succeeded. "For finishing work I used a slightly darker blue for wash on the torso to bring out the muscles. I used white on the tips of the water waves and washed in blue. Just for final effect I washed the whole figure in Pearl White (RP). Gives the figure a nice wet look - even with a flat seal cover. "So the hard way is to literally to paint stripes on the figure in shades close enough to each other that our (human) eyes can't see the distinct lines." And here's a rather advanced shading/blending/tinting method from John Colasante (johnc@colossus.cs.rpi.edu), used without permission: "Lets say you want to paint an orange tunic on a figure. Mix the base color and plop a pile on your pallete. Next to it, plop down a dark tint and a light tint. For orange, lets say dark brown and yellowish-white. It doesn't matter what kind of pigment you use, water base or oil base. Now, tint the base color with the dark tint and paint the entire tunic, or even drybrush the tunic if painting over a dark primer. When dry, paint the basecoat over the dark tint, BUT NOT ALL THE WAY TO THE EDGES. Also, leave tinted dark shade in the folds. Next, tint light and highlight the center and highspots. Note: this is similar to drybrush except you are painting color here, not actually drybrushing, so you get a certain effect which it different than pure drybrush. In fact, it often looks nice when there is a clear demarcation between the tinted shades on certain surfaces, almost like color contours. Use more than three tint levels for certain effects. It sounds tedious but if you use the palette it's _very_ fast and the results often look much better than the purely drybrushed highlights, especially for larger, flat areas where drybrushing might miss." 4.A. How do I wash? Washing comes before drybrushing. Take a shade darker than your base color and dilute it until it's about the consistency of milk. Now, brush it across, gently. It'll flow into folds and crevasses. Makes cloth look real good. Remember, you can always add wash, so start light and work your way up. Don't be afraid to wash, then darken and wash again, until you've reached the effect you like. Wash yellows with yellow-orange or yellow-brown, flesh with light brown, white with bluish-white or gray. Experiment, only you can set your style. 4.A.a. Why do my washes dry badly? It seems that once in a while, even though the inks and washes have been mixed properly, they end up drying, not in the low spots like they should, but on the high contours. It has something to do with the density of the wash and the slickness of the surface; on matte surface the effect is more prominent than on glossy surfaces. It happens because a pool of wash in a recess starts to dry from the edges, then the rest of the paint in the wash adheres to the already dry paint, producing a ring of paint around the recess. There are four methods that can help solve the problem: 1) Add a small amount of rubbing alcohol to the wash. It lowers the surface tension, and dries faster. This may be a drawback for some painters. Some model railroaders have been doing this for a while now. (Thanks to Coyt D Watters for this tip.) 2) Add a little dishwashing detergent to the wash. It helps the wash stick better. (Coyt again...) 3) Use small amounts of wash, allowing each to dry before applying the next. Blow gently on the wash after applying, from the top, to keep the pools in the recesses where they belong. If the wash is thin enough, it'll dry with a minimum of blowing. 4) Mix a new wash, thicker. It might work better, being thick enough to keep from creeping, or maybe with just little different density. 4.B. How do I drybrush? First off, drybrushing is most effective when used with a colour a shade or two lighter than the base. White drybrushed over black primer also makes for a very good painting base. It also looks good as a stand-alone colour scheme on some figures. Take your desired colour and an old brush, as drybrushing wears brushes out and tears them up (the author has had good success in using cheap watercolour brushes for large drybrushing projects with acrylic paints, but for smaller areas a better-quality brush is still necessary). Dip it into the paint until the tip is saturated, then blot on a paper towel until no paint can be seen on a dark brush, or a light one looks pretty clean. Take the brush and gently draw it along the raised parts you want highlighted. A little paint will stay on the highest edges and give great depth. Many painters like to highlight in stages, lightening the shade a little with each level. This can be either overkill and a pain or an excellent technique for brightening and preserving detail. Practice yourself and decide. 4.C. How do I highlight? Drybrushing is the best method of highlighting any large area or area with repetetive detail, such as armour. For faces, hands, buckles and the like, highlighting can be achieved by taking a slightly lighter shade of the base (mixed with white or a lighter tone) and going along the raised areas lightly. A fine brushpoint is required, as is a steady hand. For faces highlight the chin, nose, and cheeks. For hands go along the backs and each finger. For other detail, pick the spots that should show up best and give them the lightest highlights. It's common to highlight twice, each time getting lighter in tone and finer in line. A bit of blending is required to keep things looking natural, but this blending is easier than the large-surface technique. Simply keep a damp brush handy and brush very lightly toward the darker areas. Again, this technique takes practice, but is worth the effort when the miniature is completed. 4.D. What are inks, should I use them, and if so, how? Inks are just that, semi-transparent tones that can be used to add colour and shading to a miniature. If you wish to go beyond the range of paints, you might wish to try working with them. Unless using for outlining, inks should always be thinned slightly for glazing and rather a lot for washing. A milk-like consistency is best for washing (or even thinner, since you can always wash again if more is needed) and about 50-50 ink and water is best for glazing. If you do not get the specially formulated for miniatures inks (the only brand known to the author is Citadel, and they're very good), then the best information available comes from Wade Hutchison (whutchis@bucknell.edu), as posted to rec.games. miniatures and is edited and used here without permission: "A tip about Inks. If you go to the art supply store to buy your inks, be sure and get _pigmented_ inks, not transparent ones. Pigmented inks, especially brown, work much better for a wash than the transparent ones. Red and blue don't seem to matter as much. For shading white, there is a really good ink color called "Payne's Grey" whick is a kind of blue-grey. It does a much better job than black when washing white or very light tans and greys." Recommended also have been Windsor & Newton inks. Inks are best used as washes, for outlining, and as glazes. When washing with inks on a matt surface (or on any other, actually), a gentle blowing of air from the top to the bottom of the miniature helps keep the ink from drying back up into the raised areas. The author usually blows lightly until the wash stops looking slick-wet. % Glazing is done with inks. In this technique, a slightly darker tone than the base is thinned and then brushed over the entire surface and allowed to dry. Glazing brings out a richness of colour not possible with paint alone. Glazing should be done after highlighting and shading and tends to bring up detail of these well. 4.E. What colours should I use for detail work? Here's a standard chart on what looks good together (remember, nothing is absolute. Try new blends and develop your own preferences): Base colour Highlight Shade ----------- --------- ----- White (none) Gray or blue-gray Light gray White Dark Gray Dark gray Light gray Black Red Red-orange Red brown Red brown Orange-brown Dark brown Dark brown Light brown Black Pink Pink+white Red Human flesh Flesh+white or tan Red brown Tan Orange+yellow+white Brown+orange Black Black+green or blue (none) Light blue Light blue+white Medium blue Medium blue Medium blue+white Dark Blue Dark blue Medium blue Dark blue+black Purple Purple+white Purple+dark blue or black Bright green Green+yellow+white Medium green or dark green Medium green Green+yellow+white Dark green Dark green Medium green Dark green+black Yellow Yellow+white Yellow+brown Orange Orange+yellow Orange+red-brown or red Gold Gold+silver+yellow Orange-brown Silver (none) Black+blue Brass or copper base colour+gold base colour+black NOTE: colour+colour means two or more colours mixed, colour-colour means either a commercial shade of that name or colours mixed. 5. What should I use for bases? This depends entirely on what you're using the miniature for. If it's a display model, then you can get fancy. If it's for military gaming, you'll want a durable, realistic look. If it's for fantasy play you'll want durability and likely not too much fuss. Standard materials for bases are: the plastic slottabases many companies both supply with their products and sell seperately, pennies or flat washers, cardboard (not recommended - bends too easily), tiles, wood, sheet metal, matt board (available at art supply stores), and magnetic strips (often bonded to one of the above materials). Filler and water putty have both been used with success, and someone also has claimed to make his own bases out of hot glue. The general rule, of course, is the more use the miniature gets, the stronger the base material should be. 5.A. What's the best stuff to cover bases with? Again, a matter of how natural-looking and/or durable you want the base to be. For foilage, the hands-down favourite material is the model railroader's groundcovering. Woodland Scenics has an excellent selection and it's inexpensive (particularly when you figure that the small bags of the stuff can do 100 miniature bases or more). Bill Gilliland (skaven@u.washington.edu) uses something called GRASS (es, all caps) from Life-Like Scenery, which is ultra-fine sawdust which has been coloured. Verlinden is another recommended brand, available in Europe. A product called Basetex, from Colour Party Paints, comes in various colours and is available in the UK. Other materials that can be used are sand, sifted clay cat litter (not the scoopable stuff), aquarium bottom material, or sawdust. First, paint the base a neutral-type or natural colour. When it dries, take an old brush (or a cheap watercolour brush) and paint a 50/50 mix of white glue and water over the surface you want to cover. Painting the glue on gives more precise coverage than simply squirting it on. The base covering material may be applied either by having it in a tray about 1/4" deep and dipping the glue-covered bases into it or by shaking a spoonful over the wet glue. Give it an hour or so to dry and shake the miniature over the container holding the rest of the base covering. If needed, just dab the bare spots with a little more glue and reapply the covering. Mix different colours or drybrush for an irregular look, if wanted. Apply details, like rocks and the like (also available from model railroad suppliers) by dipping into the glue and setting in place with tweezers. Here are some specific methods used by gamers: Bill Gilliland (skaven@u.washington.edu) contributes: "It is handy is to keep a dry brush handy while you're doing this, and if you get flock on wrong areas, flick it off with the second brush. Old red-sable brushes will work for painting the glue on, but they're kind of soft and they can be hard to get the glue right where you want it. I use nylon brushes, they're stiffer. And painting the base before flocking is important. I use Citadel Goblin Green which is the same color as the WD photos, but I've used black before and that works fine as well." Joshua Buergel (jbbb+@andrew.cmu.edu) adds: "As for the sand method, I've used it on a couple of titans I painted, as the bigger area you cover with this particular variety of flock, the sillier it starts to look. I use aquarium sand from a pet store and do the above process, only dipping the miniature in sand. After waiting a couple of hours or more for the glue to dry (if you don't, when you do the next process the sand starts coming off), I use a heavily watered down woodland green and paint all of the sand. After again waiting a long time for this to dry completely, I dry brush sunburst yellow on top. "Dry brushing" isn't entirely accurate, though, as I do not wipe the paint off the brush completely. Rather, I take one swipe on a piece of paper to rid the brush of a little paint, and then use a dry brushing sort of motion. This makes the top of the sand yellow but leaves the bottom bits clearly green." Then back to Bill: "I use this method on all my 28mm models and titan-bases. The stuff was white sand (I forget if it was coral or dune sand) and 3$ got me about 4 kilograms. I've also used sand from playgrounds, but this is more irregular than aquarium sand. Again, flick off sand then let dry. "Painting 28 mm bases can be done any number of ways. For fantasy I paint Goblin Green all over the sand and sides, then `damp brush' (as Josh described, pretty much) `bilious green' on the top of the sand. This provides a neutral texture to accentuate the model yet not detract from it. "For 40K-types I do the same, but when I'm done I go over the side with black paint. This is because I started painting for space hulk, and this looks better in the corridors, but on the table both black and green edges look fine. "Also, the best looking 28mm bases I've ever done were painted all black to begin with, then drybrushed dark green-mid green-yellow green-yellow, and the edges were kept black, but this took FOREVER to do. "You can also just paint the base black and have unpainted sand on the top (sandbox sand looks better than white sand -- it's speckled) I did this on all my Blood Bowl miniatures and it looks fine. "But whatever specific method you choose, try to do the same thing to all the models in an army, and at least the same thing to all the models in a unit. A simple unit with neatly done bases often looks better than a well-painted unit with sloppy or completely unpainted bases." 6. How do I strip paint? There are several substances which will work, outlined below. Other than the top two (which are the author's personal default choices), they're in no particular order. a) Pine Sol for a 24-hour soak then brush off remaining paint with a soft toothbrush. Works great on metal. Brian Lojeck <lojeck@mizar.usc.edu> ran extensive tests on Citadel plastic genestealers and Pine Sol for paint removal. Here are his results: "I soaked the plastic genestealer in about 50-50 Pine Sol/water solution for 7-8 hours (a nights sleep). The plastic didn't seem softer, the detail didn't seem any worse, and the paint came off pretty well (as it always does with Pine Sol. it was hard getting the paint out of the cracks (I soaked in acetone to do that)." Then he soaked some unpainted Citadel plastic figures in another 50-50 Pine Sol/water solution: "The figure survived whole, without softening or loss of detail. The solution turned milky white about 30 minutes after the experiment started, but had cleared back to golden by morning." <Britt's note - that's the standard Pine Sol reaction in water, does same when I'm cleaning the toilet.> Brian left the figures soaking another 48 hours and they didn't mar under the toothbrush bristles, but he was able to stick his fingernail into the plastic about 1/16". It looks like the 50-50 mix is the key. Certain other pine-oil cleaners of less strength than Pine Sol are on the market. Anyone who tests these on plastic figures is encouraged to send the author your results for inclusion here. b) Chameleon model paint stipper from Custom Hobbyist, Inc. found in model railroad shops. Sort of expensive, but _reusable_, water soluable, and really fast. c) Floquil/Polly S Dio-Sol. Also purportedly dissolves glue. Won't harm your plastic as much as Pine Sol, but reportedly loses detail due to the amount of scrubbing necessary for the recesses. d) Brake fluid. Won't melt your plastic, but might melt your hands... 2-3 hour soak _maximum_, usually works faster. e) Dettol, the pharmaceutical cleaner. Works much like Pine Sol, but I have no information on its potential to melt plastic. Though it didn't melt the base on the test figure, bases probably aren't polystyrene. It did remove glue, though. (Thanks to Steve Gill for this bit.) f) "The Sainsbury's home brand pine disinfectant (UK). It actually gives pine oil as one of it's ingredients. In testing it works very well and costs roughly 99p per 750ml bottle." (More thanks to Steve Gill who found this product and tested it.) g) Acetone nail polish remover. Smells, peels skin, melts plastic, takes paint off metal like a champ. h) Isopropyl alcohol, the stronger the better. Lab grade, if you can get it. This seems to be the safest product for use on plastic miniatures, and also the most universally available. "It takes off acrylic paints in almost no time, but reportedly doesn't do as good a job in crevices as Pine Sol does. As for oil-based paints... "after several days of soaking, renewing renewing the solution, scrubbing... the figurine I tested has still a good portion of its paint on, mainly on the zones that I cannot access with a toothbrush." - Magali Mathieu i) Easy-Off oven cleaner. And wear gloves. It reportedly will not harm metal or plastic minis. Remember to use GOOD ventilation. (Thanks to Richard Kurtin for this information.) j) "Bix Paint Stripper. Buy the sprayable, rather than the jelly mix. It smells bad, is volatile, and will go after your skin if you forget your gloves. It will remove enamel paint with minimal scrubbing, and does a pretty good job on acrylic. It _WILL_ eat plastic, so don't even think about putting your Genestealers (tm) in it. Also, you'll probably find yourself replacing your toothbrush more often." - Pete Siekierski k) "Methylene Chloride. One of the components of Bix Paint Stripper, MC is rarely available in its purest form (I've no idea where my dad got his can, and neither does he!). It is extremely volatile. Do not light up near a can of methylene chloride! It will also do a number on your skin, making it wrinkled like you've been all day in the bath. Wear gloves! Also, be sure not to wear metal jewelry. Because of its high rate of evaporation, MC "chills" metal, and this can be very uncomfortable if you immerse a ring in it... On the plus side, pure methylene chloride is even more effective than Bix, which contains only a small amount. It burns right through any kind of paint that you'd care to put on a miniature, and will reduce plastic Genestealers (tm) to shapeless lumps (big deal, heavy flamers do that too!). It will "chill" lead or pewter miniatures, so they will feel cold to the touch, but in a room- temperature environment, this will wear off quickly. Like the Bix stripper, you'll find yourself replacing your toothbrushes more often." - Pete Siekierski <psiekier@isc.jsc.nasa.gov> (Archiver's note: Proper dental hygene suggest that you replace your toothbrushes every other month anyway...) l) Poxy Scum <shughe10@scu.edu.au> in Australia also offers this info: "I found that Rexona(tm) Sport pump spray, not the aerosole works quite well, almost immediately on acrylic Citadel paints. It is best used for spot cleaning as it works almost instantly to soften paint and is quite safe on plastic and metal. As you can see, there are a lot of products that will remove paint. Most are caustic. The author recommends a non-caustic product. Pine oil cleaner will remove any type of paint (acrylic, oil-based, Rust-O-Leum, fingernail polish, etc.) from miniatures with no loss of detail, no caustic residue, and no hazardous fumes. It's safe for metal miniatures and will not dissolve the glue holding parts together. Pine-Sol is the best brand, as it's 19.9% pine oil, but any percentage over 5% pine oil will strip paint (it just requires a longer soak in the less-powerful cleaners). It also works on paint that's been on for several years (the author successfully removed 10-year old Testors from a metal miniature with a 2-day Pine-Sol soak). For plastic miniatures, Pine Sol in a 50-50 solution with water, else isopropyl alcohol is your best bet. Dettol, a product from the UK, seems to work as the US Pine-Sol does in preliminary testing. More information will be made available as testing continues. Simply place the miniature in a container which will allow full coverage, pour in enough pine oil cleaner to cover, and let it soak for 24 hours or more. The longer the soak, the better the stripping (the author has soaked metal miniatures for over a week with no damage resulting). If you're doing multiple miniatures, it's best to soak them seperately, if possible. Once the paint starts to dissolve, it causes a sliminess that can get on the others. After the soaking, take an old toothbrush (dry) and scrub. A soft bristled toothbrush is best, however using soft then stiff will get most everything without special work. The finest details are kept, the paint comes off easily, and the smell doesn't try to knock you out. If some paint remains stubborn, another soak will do the trick. (The tip of a toothpick is also good for crevasse-cleaning as are standard pipecleaners.) Do wear gloves if you're skin-conscious. The author doesn't and has never suffered for it, but others report peeling and irritated skin. NOTE: Many people have complained about the pine-cleaner soak darkening the metal of the miniature. The author just finished cleaning a lead miniature on which the acrylic paint had been for two years. It soaked for 24 hours and was first scrubbed with a soft toothbrush then a stiff one until all the paint was removed. Then the soft brush was washed clean and hand soap (the bar of Ivory by the sink) was applied to the brush and the miniature was brushed down vigorously, as one would do teeth. It took about 5 minutes, but the lead shined up as good as the fresh-from-the-package figures it ended up beside on the shelf. So the `dark metal' syndrome can be taken care of, if it's important to you and you care to spend the time. 7. What kind of miniatures should I start with? 25mm is easier to detail than 12mm or 6mm, some miniatures are less or more detailed than others. Again, this is much a matter of personal preference and what you want the miniatures for. Look over as much as you can before selecting starter miniatures, unless you have your heart set on something. Just don't pick something so fussy or detailed that you'll get frustrated with your new hobby on your first project. Also, refrain from doing that `special' one until you've had a little practice. Some offerings of types in the 25-30mm range are: Citadel: tend to have large areas and broad features, and are recommended `beginner' pieces if you can't find something better. Once you have the feel of painting, can be masterpieces. Heartbreaker: Everything good about Citadel plus some of the most excellent modelling ever done in this style of figure. And costs less, too. Metal Magic: again, heavier features, thus good for the novice. Mithril: pre-primered and a little above 25mm, broad detail Ral Partha: tend to have sharp detail, good once you have the basics down. Grenadier: detail can be hard to follow, but that can be a plus. Soldiers & Swords: Good variety in both individual figures and quality. Some are excellent, some aren't worth the purchase. Simtac: Good figures with fine features and nice detail. A little difficult for the beginner. Various military miniatures: varies greatly, use your own judgement. 7.A. Metal or plastic? Opinion varies. Some favour plastic because it's cheaper, some prefer metal for better detail. Choose according to your own budget and preferences. 7.A.a. My miniature came in multiple parts, now what? Get the smallest file you can find, a pair of scissors, and some glue. If it's a plastic miniature, you can use model cement or super glue, if it's metal use Zap-A-Gap, super glue, or any model formulated cryanoacrylate. On plastic, first clip in as close as possible with scissors (nail scissors are excellent) then file. On metal, carefully file the edges. The goal is to get the pieces to fit together as closely as possible. Once they do, clean them with soap and water to remove all shavings, dry, and glue. Hold for about twice as long as is recommended for the glue to set. The innovative miniaturist can come up with a great many ways to clamp, fasten, or hold parts together until everything's dry. (Regretfully, the author has forgotten who posted this tip [likely it was Tom Harris], but it's excellent: "A little note, if you're working with super glue keep a wet teabag handy. If you spill super glue on your hands wipe it on the teabag and the teabag will absorb it - teabags are highly absorbant of chemicals. It works great for me and I don't end up with shells on the ends of my fingers of dried super glue.") (This one comes from John F. Bailey <jfbailey@spk.hp.com>: "If you do become adhered to yourself or pieces via superglue (cyanoacrylate), most of them can be dissolved with acetone. May take a little soaking, but it works. Unfortunately it also removes skin oils almost completely. Follow it with isopropyl alcohol to neutralize the acetone then lots of soap and water to neutralize the alcohol, and then a good moisturizing lotion to replenish skin oils and avoid those nasty dry skin diseases (eczema, etc.). A bit of a pain, and it eats most plastics, but a whole lot better than surgery to remove that battle-axe. A preventive technique is to use "barrier creme", not a lot of mechanics in this country use it even though it is very common in the UK, but I have obtained it by asking for it in pharmacies/drug stores. You put it on like hand lotion before you get into something. It dries to a thin film that protects your skin from most solvents, gas, oil, etc., and washes off with soap and water.") Note: If working with cryanoacrylate, have the acetone (nail polish remover is the most available form) on hand and nearby. When you aren't prepared, you'll end up stuck to something. Murphy loves modellers. Once the glue has dried, take an X-acto blade or razor blade and carefully clean off the excess glue, if any. A file or emery board will also do the trick. You'll have to wash the miniature again before primering, to remove hand oils and glue remains. After you've gotten the basics of gluing your miniatures, the best stuff you can use is epoxy. It's permanent, filable, and works exceptionally well on miniatures that will get a lot of handling. 7.A.b. What is pinning and how is it done? Pinning is a method of securing multiple-piece miniatures by drilling small holes and inserting wire before gluing in order to reinforce the joint. Required are a pin vise, suitable size drill bit, thin wire (copper wire, paper clip wire, anything like that) and either cryanoacrylate model glue or epoxy. Complete instructions come courtesy of Bill Thacker (wbt@babel.cb.att.com): "Either adhesive, properly applied (that is, to _clean_ surfaces) will give you a joint strong enough to withstand normal handling. Neither is guaranteed against serious abuse (poorly-packed figures rattling around the trunk of your car, or being carried `by the handful'). If you want a _very_ strong joint, get a very fine drill and some piano wire. Using a shoulder joint as an example: drill a hole in the center of the joint, a quarter inch or so into the body of the figure. Insert the piano wire into the hole (you want a gauge of wire that fits well, but not so snugly that you have to force it in the hole) and, using side-cutting pliers, snip it off flush with the hole. This will leave you with a chisel-point on the piano wire, just slightly protruding from the hole. "Now take the loose arm, align it to the figure the way you want it set up, and press firmly. The chisel-tip on the piano wire will have left a nice gouge showing you where to drill the mating hole. Remove the piano wire and discard it; drill the mating hole about a quarter inch into the arm (or as deep as the figure allows). Cut another piece of piano wire, a half inch or more, and insert it into the figure; then attach the arm. You may need to trim this down until the arm fits flush with the shoulder joint. Epoxy or superglue this in place and the joint will never fail. "This technique is rarely needed for something like an arm or hand, but for assembling large figures (dragon wings!) it's invaluable." 8. What is kitbashing? Kitbashing is the colloquialism used by miniaturists to describe the process by which a miniature is converted from its original form to another permutation, such as taking a fantasy miniature and making it into a figure for superhero roleplaying, or changing gender. Most properly, it refers to the instances when two or more figures are used for components in the final version. 8.A. How do I convert miniatures? It's an acquired skill. To convert a miniature requires a lot of imagination, steady hands, patience, and a few out-of-the-ordinary tools. Costumes have to be obliterated, faces changed, weapons removed or added or changed. In all honesty, the processes involved are more numerous than can be addressed in this FAQ. Therefore, only the most common modifications will be addressed. Tools: To properly modify a miniature, you're going to need: files (round, triangular, square, flat), the smaller the better X-acto knife and several replacement blades glue, preferably Zap-A-Gap, possibly epoxy nail scissors or tiny wire cutters needle-nose pliers, the smaller the better sandpaper and/or emery boards a hacksaw, the finest you can get any new pieces you want to add (weapons, etc.) % The most common modification is to change one weapon for another. For purposes of explaination, a fantasy figure will be used, the change being from sword to battleaxe, assuming the sword had been molded as one with the hand. First, clip or cut the sword off on either side of the hand, being very careful not to damage the hand. The new piece may be one cut from another miniature, or one acquired from a weapons pack. If it is the latter, you will need to measure it against the hand and cut out part of the handle to compensate. The next step is to make holes in either side of the hand where the handle enters in order to insert the new parts. An X-acto blade or file may be used. A pin drill would come in handy about now. Once the holes are made, a drop of glue is placed in each one, then the handles are carefully set in place. The glue should show, as the extra is needed to keep the parts in place. Hold until set, possibly reinforce with a little tape, a brace, or some sort of clamping arrangement, and let set. After the glue is thorughly dry, a file or emery board can be used to clean up the excess, Avoid using a knife or razor blade, as you're likely to take off too much glue and the weapon will simply fall off again. % Another common modification is to make a miniature suitable for superhero use. The easiest way to do this is to file and sand the clothing smooth with the rest of the body, then paint on the costume of your choice. A note on drilling, thanks to Andrew Reibman (alr@cbnewsh.cb.att.com) "A useful tip for figure converters and folks drilling out spears to replace them with wire. Before drilling (with either pin vice or dremel tool) dip the bit in Johnson's tube wax (what the pros in the machine shop use), dryed-out Simonize car wax (my choice), or other wax. Even a bar of soap may work. "Since a buddy of mine who spent his career in machine shop recommended this, I've cut bit breakage down by a huge fraction, and starting and drilling are both much easier. I use to break my .014 bits, used for starter wholes in tough 15mm jobs, about once every ten holes - well that's an exaggeration, but I did break a lot of bits... The wax lubricates the bit, and "keeps the flutes from filling/jamming", allowing the cutting end of the bit to do the job more effectively." Brian Oplinger (oplinger@ra.crd.ge.com) says that turpentine, mineral spirits, and paint thinner also make good bit lubricants. If things get hot, though... And remember to ventilate. 8.B. What kind of glue should I use? The common miniaturists glue is Zap-A-Gap, available at nearly all stores which sell paints. It's thick, holds well on both metal and plastic, and fills gaps and cracks. Also of this type are a line of cryanoacrylates which come in various-coloured bottles, each coded to its type, and a blank space for the local store's name or Wargames West (in the US, of course). Super glue is often used to join pieces; it dries brittle and a good drop might snap the connection. Its redeeming feature is speed of bonding. Epoxy is excellent for permanent bonding and building up areas when modifying. The bonds it makes don't break when jarred, and almost nothing will remove it once it has set (the author has never heard of set epoxy being removed, but refuses to use absolutes and be later proven wrong). Epoxy also comes in different formulas for different materials. Duco cement is a good all-purpose bonding agent. White glue, such as Elmer's or Aleen's Tacky, is good for adhering paper and groundcovering to plastic and metal surfaces. White glue does fatigue, however, so if it is used, a sealing agent overall will help keep your pieces together. For building up areas and the like, nothing beats ribbon epoxy. For more information on cryanoacrylate see section 7.A.a. above. 9. How can I paint details? Finest brush you can get, a steady hand, lots of patience, and good lighting. Fine detailing includes (but is by no means restricted to) faces, eyes, jewelry, shield devices and banners, small clothing details, weapon decoration, insignia, and armour detail. For many of these, some of the highlighting/washing/drybrushing tips above apply, for others a whole new range of techniques are necessary. 9.A. How do I paint faces? Start with the eyes. Then do the face in whatever shade you choose. Now add a touch of white to the flesh tone to get a slightly lighter shade and go back over the nose and cheekbones. A light orange makes defined but natural-looking lips. Remember, red lips are a product of makeup, not nature. Some painters prefer to put the eyes on last, but others say it's too hard to keep from making the effect pop-eyed when done last. Try whatever method you prefer. Moustaches are best if dry-brushed, paint beards a slightly redder or darker shade than the hair and dry brush with the same colour you use on the hair. There's nothing wrong with a 5-o'clock shadow on an appropriate figure, either. Dry-brush it on in a shade slightly darker than the hair. Once you get comfortable with faces, experiment with scars or tattoos. You might amaze yourself. 9.A.a. How do I paint eyes? Depending on the size of the miniature, there are a couple of good methods. On a 15mm or smaller miniature, don't try too hard for absolute detail until you've gotten a lot of practice in. On 25mm and larger, though, eyes can be done rather easily (with practice, of course). Below are several methods: % Before painting the face, paint the eyes white. When that's dry, dot them black. Then paint a slightly darker shade than you're going to use for the rest of the face around the eyes to define them (mix a touch of brown or tan into the flesh tone for this). Then paint the rest of the face. % [This method is courtesy of Andrew Cameron Willshire (s921959@yallara.cs.rmit.OZ.AU) ]: "Another easy way is to paint the white of the eye with a brush. Let it dry. Then, take a tech pen (architectural or engineering) and draw the iris. With another tech pen, dot in the pupil. Note that this requires a few different pens since you'll want a few different colours - say black, blue, brown and maybe green. "This is a really easy technique, and since the ink is water based if you muck up you can just rinse it off (this is assuming you use enamels for the rest of the figure, like I do)." [Author's note: even if you use acrylics, if the white is already dry you can still blot the ink off with a damp Q-tip or the tip of a damp, fine brush.] "It also works great on monsters, say orcs. However, they tend to look better with `reds' instead of `whites' in their eyes, then having a white iris and black pupil - very nasty looking! Tech pens may be a little pricey to pick up, but you can easily find sets with a few in them that are reasonably cheap. They also work magnificently for such things as flag details, shield heraldry and so forth." % Steve Harvey (dwallace@wam.umd.edu) has some advice regarding affordable tech pens: "Most tech pens are obscenely expensive, but there are two brands of non- refillable tech pens that I am aware of. Sakura makes an excellent series of tech pens called Pigma - these come in a variety of colors, in sizes ranging from .005mm to .8, and cost about $2 each. I like these so much that even though I have a set of Pentel professional tech pens, I use these instead. Schwan/Stabilo also makes a series of pens called OHPen 96 (or at least that's what it says on the barrel of mine...) which also come in numerous colors and several sizes. They are not as fine as a true tech pen, but they will write on ANYTHING - glass, plastic, etc. without the ink beading. The one thing to watch out for is that they come with either permanent or water-soluble ink; the latter are popular as overhead transparency markers, but for miniature work, the permanent is what you want." % [This method is given by Allan Wright (aew@spitfire.unh.edu) and has been edited]: "I paint eyes on 25mm (and 15mm officers, standard bearers, etc) with a technique taught to me by a friend. 1. Fill the eye socket with white. I use an OOO brush, one stroke horizontally across each socket. Be sloppy, it's OK. 2. Paint the middle of the eye, Black, Dark brown or Dark blue. Paint a vertical stripe down the center of the eye - taking up the middle third of the eye socket - don't worry about going over the top/bottom edges. Again I use an OOO brush. In both let the brush 'fan out' 3. Eyebrow - paint with hair color of your choice. Paint the eyebrow on the ridge above the eye socket in a slight crescent shape, cover the white and black from 1 & 2. 4. Under eye: use tan or slightly darkened skin color (under the eye is usually darker or shadowed). Cover the white and black from 1 & 2 with a slightly crescent stroke." [The author has adapted this method slightly and finds it most effective thus far. Suggest you try this at least once.] % Bill Gilliland <skaven@u.washington.edu> says: "For humans, I paint the entire eye socket black. Then, on either side of the center where the pupil is, I put a small white dot to show the whites of the eyes. On character models, I paint the iris a solid circle (usually blue or green) with a highlight in an upper corner, then put a smaller dot of black in the center. This method gives you outlining of the eye for very little effort. "For evil creatures (such as orcs) I paint the socket black, then put a white oval inside, leaving an outline all around. The white is then overpainted with red. On characters the corners of the eye are spotted with a translucent yellow to accentuate the red pupil." % Derek Kingsley Schubert (dks@acpub.duke.edu) explains his method: "Faces/eyes: Shade/highlight the face completely first. Paint dark brown or black in an area just slightly larger than the eye itself. Then paint white for the eye, and finish with a dot of dark brown or black for the iris. Colored irises don't look good unless surrounded by a dark ring to set them off from the white; but this is darn tricky, so new painters should paint only dark irises on figures that should have humanlike "white-and-iris" eyes." 9.A.b. How do I paint hair? It's honestly not as hard as it looks, though you do need to both wash and drybrush it. Base in a good neutral tone for the colour you want (a dark yellow for blondes [tan, dun, khaki, yellow], dark red for redheads, lighter for auburn, orange for strawberry blondes, any shade of brown for brunettes, and black or dark blue for black hair). Then darken it or select something a couple of shades darker and wash. Let that dry, then wash thicker and darker. Let that dry and drybrush with the original colour. Then a lighter shade. (For black hair, drybrush in dark blue and leave it at that, drybrush in dark gray, white or light for salt-and- pepper, or don't even bother to drybrush if you like the colour it ends up after washing.) Black hair can honestly be achieved with a dark, dark blue base, two black washes (one light and one heavy), then a very light dark blue drybrush. A royal blue drybrush achieves a nice punkish-look. Blonde starts out best with a dark base then lightening with drybrushes. Wash chestnut or light brown. Redheads are best if understated a little. Don't use red unless you want something impossible to nature. Dark red-browns are best (Polly S Demon Deep Red is great, too) washed in brown and highlighted with first the original shade, then something lighter in that line, then perhaps a dark orange or yellow-brown brushed very, very lightly. Here are some extremely good tips from Chris Pierson <cpierson@interlog.com> for specific hair colors: "Golden blond: Polly S Canine Yellow-Brown, drybrush with Polly S Griffin Hide (_don't_ use the "real" yellow as a base coat. That oughta keep it from looking like Loni Anderson. :) ) This one works well for elves. Ash blond: Sort of a Norse-type blond, very pale. Polly S Manticora Tan (a light tan), drybrush with Ral Partha Ivory. I've got three redhead styles: Auburn (dark redhead): Base coat Ral Partha Dark Brown or Polly S Kobold Dark Red-Brown. Drybrush with Ral Partha Red- Brown. Redhead (standard): Base coat Partha Red-Brown. Drybrush with Polly S Rust. Strawberry Blond (light goldy red): Base coat Polly S Rust. Drybrush with Polly S Manticora Tan. For the Polly S impaired, Rust = reddish tan; Manticora Tan = light sandy tan." Griffin Hide = dusty yellow 9.B. How do I paint insignia? Two good methods have been presented in rec.games.miniatures. The first comes from Steven Loren Lane (lanes@spot.Colorado.EDU), and is used without permission: % "Well, on top of getting the smallest brushes available, you can always cut them down to an even smaller size. I have several brushes that have only a few hairs on them. These are very useful brushes. I would also recommend for the very fine detail to set the object up so you can use both hands to hold the paint brush as still as possible." And was followed up by Steve Gill: % "Another useful tool is a 0.13 mm spirograph ink pen, a couple of splodges of colour in the right place and you can pretty it up with the pen. I used this technique for 6mm heraldry." Yet another use for tech pens. They are also very good for shield devices and clothing patterning. 9.C. How do I paint armour? For fantasy and historical, some suggest not priming the miniature, then washing or drybrushing (or both) the bare metal, but to others this looks sloppy and unfinished. Besides, not much armour looks like lead, and lead certainly doesn't make good armour (nor do any of the alloys of which miniatures are cast). Paint the armour a base-metal colour, usually silver or one of the like tones, and let it dry. Don't be afraid to use bronze, or gild it, though. Then take a black wash (ink is excellent for this) and go over it carefully. Let that dry, then take either your original colour or a lighter shade and drybrush. Remember to use a seperate water/thinner for the brush you're working the metallics with, so as to not get flecks in the other colours. Steve Gill (steve@caws.demon.co.uk) shares his method of painting chainmail: a) If the links are sculpted clearly enough that you can see the leather underneath then base coat should be leather (whatever colour required by the figure). If not ignore this step only paint leather around the edges where it should show under the links. b) The links are painted in dark metal. c) Drybrush the links in lighter metal. d) Highlight drybrush in very light metal. In general I would choose gunmetal as the dark metal, steel as the lighter colour. Heroic figures could use steel with silver, but try to keep this rare. Darker chainmail is probably much more historically correct than the usual hollywood style silver armour. Dan Evans (evansd@bbs.ug.eds.com) has a method suitable for SF figures as well as fantasy: "I've come up with a way to get interesting results with metallic colors. (Maybe someone else has done this before...) Basically, the trick is just two steps: 1) paint your figure (or part of it) silver. 2) when it's dry, apply colored ink (I have the Citadel set) over the silver. The cool part is, you get unusual control over the degree of tint by applying the ink straight from the bottle or by watering it down (a wash.) Another cool part is, you can blend one color into another. Suppose you have a warrior with a shield, and you want it to fade from metallic blue at the top to metallic green at the bottom. Paint the whole shield silver first, and then when it's dry, apply blue ink to the top half. Next, apply green ink to the bottom half, mixing it up with the blue in the middle. "Yet another cool part is light-to-dark shading done this way: Suppose you have a Space Marine and three shades of silver paint. (The shades of silver may be sold as "aged metal" or "chain mail" or "gunmetal" or "silver". Use your eyes: buy a blackish silver, a dark silver, and plain old silver.) I'll just call them dark, medium, and light. 1) Paint the entire figure with the dark silver and let it dry. 2) Drybrush the entire figure with the medium silver and let it dry. 3) Drybrush the entire figure again, concentrating on raised details, with the light silver and let it dry. 4) Right now your Space Marine should have a pretty nice shaded metal look. Now go over the whole figure with red ink, and you'll have a shaded RED metal Space Marine. Hey, you could even try technique B at this point, maybe with purple or orange blended into the red." There is a caveat to this, however. Be careful using inks with acrylic metallics. There is often a reaction between the two which give some nasty effects. At the very least allow the metallic to dry for 24 hours before adding inks. Some people have had only bad results from inking over acrylic metallics... Test it before you begin your masterpiece. 9.D. What other detailing can I do? Get in the light and give your miniature a good look-over. Usually a dot of paint or careful drybrushing will bring out the final details. Certain specialized questions have been asked, the answers to which are given below: % Does anyone have a decent method for painting torches? This answer came from D.R. Splatt (edd440u@nella02.cc.monash.edu.au): "The best I've personally seen was to paint the flames red at the base, orange for highlights, yellow for the bulk of the flame and a light drybrush of white (or black for a smoky flame). Try to get the flames predominately yellow, eg: | <--------- White | | | | <--------- Yellow | ._| | | | |<-|--------- Orange \_(o)_/ !------------- Red Also a 'ragged' orange layer looks good." % From Kent Reuber (reuber@hydra.rose.brandeis.edu): "People doing micro-armor have been using this sort of thing to simulate burning tanks for quite a while. Paint the torch itself black. Then tear off a small bit of cotton, paint the upper part grey-black and the lower part red-orange. Glue this bit of cotton onto the torch." 9.D.a. Can I use anything besides paint and ink for details? Of course you can. The simplest are decals, which are sold by the sheet and have many different styles to choose from. Technical pens can be used for a lot of intricate work, as can fine tip permanent markers. There's a catch to the markers, though, they can bleed when overcoated. Alec Habig (ahabig@bigbang.astro.indiana.edu) has a good remedy: "I used some fine tip permanent markers to do letters and lines on some minatures. This works well, giving better results than painting the same sort of stuff. The problem - the marker would bleed when I coated the minis with the obligatory DullCote lacquer. The solution - I rubbed a little bit of good old Elmer's white glue on the spot that I'd lettered with the marker. Just a bit, and rubbed it around till I couldn't see it anymore. This stopped the bleeding, without altering the finish in any noticable way." Mariano Flores (mflores@SU1AG.ess.harris.com) gives these tips for decals (used without permission): "For best results of decals adhering to the surface of your miniatures: 1. Spray miniature with a shiny gloss coat (I use Testors Gloss Coat). You will find that decals adhere better to smooth surfaces. 2. Let gloss coat dry, maybe an hour or two. I usually let the coat dry for a whole day. 3. Apply decals to model. It is suggested to use distilled water, since tap water is not that pure and may contain some contamination (i.e. iron). 4. Let decal dry for a day. The wrinkling effect on decals is usually caused by applying the dullcoat or semi-gloss coat to a decal that still contains some moisture. 5. Apply dullcoat to model. These procedures seem a bit drawn out, but patience is a virtue. These procedures work for me." There are probably dozens of other common and unusual detailing tips out there that the author hasn't heard of yet. She'd love to have them sent in for inclusion here. 10. What is an overcoat and should I use one? An overcoat is a coat of clear paint that protects those colours you so carefully put onto your miniature. Even an unhandled figure will begin to dull after awhile, and one in regular use will lose its paint even faster from hand and carrying case friction. So you should put a protective coat over the miniature to make sure the paint remains unmarred. Overcoats come in three (possibly four) types: gloss, matte, flat, and lusterless. Though four types are named, one company's matte is another's flat, flat and lusterless are often interchanged, and matte occasionally is labeled semi-gloss. When in doubt, test or ask. Overcoats also come in two different applications, brush-on and spray. Spray is easier to use when you want a uniform coating, brush-on is good for when you only want certain parts covered. Spraying overcoat on a miniature is much like spraying primer, though 3-5 coats is recommended for maximum protection. Remember to begin and end the spray beyond the miniature in order to get the cleanest application. Gloss is just that, shiny. It is most usually used on cars and other items that should shine. Semi-gloss (satin, sometimes called matte) is low-luster, and very durable on a figure that will be getting a lot of handling. Unfortunately, it tends to look artificial on humans and some animals. It's excellent on scales, however, and hard leather. Flat (also sometimes matte) is nearly without shine. It's a good all-around people coating, exceptional on animals, where it simulates fur's natural shine. Lusterless is absolutely flat, it doesn't even look like it's there. It's perfect for people and cloth and anything else that should have no shine whatsoever. Several coats can be applied and it never shows. A good method of overcoating a realistic-looking human/humanoid is to use a spray lusterless overcoat and put on 3-5 coats, then after the last coat is dry, use a brush-on matte or gloss to go back over all metallics, jewelry, eyes, lips, and anything else that should have a shine to it. This is the author's favourite method. Companies making overcoats are (+ denotes brush-on, = is spray): Armory (water-based acrylic): Glass - a high-gloss + Matte Sealer - low gloss = Floquil (oil-based enamels): Flat Finish - completely lusterless + High Gloss - very shiny, looks wet + Crystal-Cote - not quite as shiny + Al-Pro-Cote - flat finish + Glaze - a lovely matte/satin finish + Figure Flat - a low-shine matte = Floquil Flo-Stain (oil-based, for wood or over paint): Glaze - as above (I use this) + Crystal-Cote - also as above + Al-Pro-Cote - flat finish, no shine + Humbrol (oil based): Dull Cote - flat finish + Krylon (spray only) Clear Matte - low gloss = Model Master (oil-based): Lusterless - another lusterless = Gloss Finish - high-shine = Pactra (water-based enamels): Flat Clear - lusterless + Gloss Clear - shiny + Polly S (water-based acrylic): Gloss Finish - high shine + Flat Finish - lusterless + Ral Partha (acrylic) Spray Clear Matte Sealer - low gloss = Clear Sealer - matte finish + Testers (Oil-based enamels): Flat Finish - again, lusterless + Gloss Finish - shiny = DullCote - absolutely flat = There are others, of course, these are only what the author knows about. 11. How do I keep paint from drying out? Shake or stir them often, put plastic wrap between the cap and bottle on paints that come in glass jars. Acrylics reconstitute fairly well with the addition of water and a good stirring. Oil-based do same with thinner. Try and keep your paints in a place where temperature remains fairly stable. Users of both Polly S and Humbrol have had good results from storing their paint upside-down. The paint itself augments the seal and keeps all air out. 12. How do I use an airbrush for miniatures? The best paints for airbrushing are Accuflex and Humbrol, with Polly S and Testors each selling an airbrush thinner for their paints. That's the bulk of what the author knows on the subject. Some excellent information was posted to rec.games.miniatures by Mike N. Tassano (miket@netcom.com), much in regard to advising a novice airbrush painter, and is reproduced here without permission and with minor editing: "I've done a lot of airbrush as well as regular airgun painting, so maybe I can get you pointed in the right direction. "There is a relationship between the airpressure used and the rate at which the thinner evaporates. Ideally, the carrier or thinner is still liquid when the paint strikes the surface to be coated, but not so liquid it runs off. Inks have a really slow thinner, relatively, but since you're doing a wash, you don't care if it's really wet on contact. The idea is to puddle ink in the low spots anyway. "The primers usually have a fast thinner, allowing a good coating without running. Spray cans _usually_ are balanced between pressure and range and thinner and particle size. "Second, the pressure in the air-cans varies wildly as you use it up. And as the temperature changes. (So does the moisture content from condensation caused by cold air) Even the best airbrush will behave in a cranky way with canned air. "Third, the type of paint or ink used may not be too friendly to airbrushing. Particle size needs to be pretty consistent for spraying. A lot more consistent than brushing requires. If you intend to stay with airbrush priming, I can offer some possible helps: "1. If you can ONLY use canned air, shoot for shorter sessions. Let the can warm back up a little more. "2. Try an alternate air source, a compressor or an innertube filled at a service station. You want as little pressure difference between your air source and the spraying pressure as you can manage. "3. Use a primer designed for spraying. There are some hobbyist brands around that might be available where you are. "4. Practice, practice, practice!" And a word about priming, thinning and cleaning from Ed Sharpe (esharpe@hsc.usc.edu), which is also edited and used without permission: "After carefully cleaning, washing and drying the figures, I prime them with Testor's flat white mixed 50/50 with airbrush thinner by Testors. I apply the paint using an air brush. It usally takes 2 to 4 coats. Take your time and do not rush any of the steps. I use the Testor's air brush thinner only to thin the paint. I use general paint thinner from the hardware store to clean my air brush." 13. How/where do I get miniatures? Game stores are, naturally, the best choice. Some comic and hobby shops deal in miniatures, so ask around. And a lot of companies do mail-order for those who live bereft of their product sold locally. The yellow pages is where to start, after that you get the feel of where to look. 13.A. Is there a list of companies? Thanks to immense assistance from many, many readers of and posters to rec.games.miniatures, there is. It was kept by Keith Lucas for awhile and will be again, is currently kept by tierna@agora.rdrop.com, and is posted sometime near this FAQ to rec.games.miniatures. It is on archive for ftp at ftp.indirect.com in /pub/rpg/miniatures and also by email from tierna@agora.rdrop.com (yes, that's me again) who would be glad to send it out to anyone who wants it. -- Descriptiones habeo catapultae novae quae saxos multos separatim et simul iaciant. Si illas prehendat, sit finis terrae qualem cognovimus. |
Current project:
A slew of Wood Elves
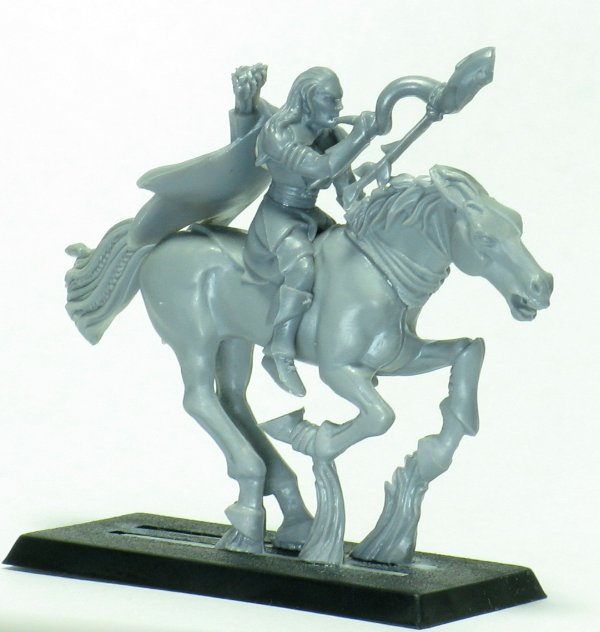
 Qazzi’s Progress
- An error has occurred; the feed is probably down. Try again later.

very good information